Getting to Know BlendGAMer
Note
You can always hover your mouse over an button or option of interest and a pop-up will appear with a long description.
The BlendGAMer toolshelf contains for major menus:
Surface Mesh Conditioning Menu
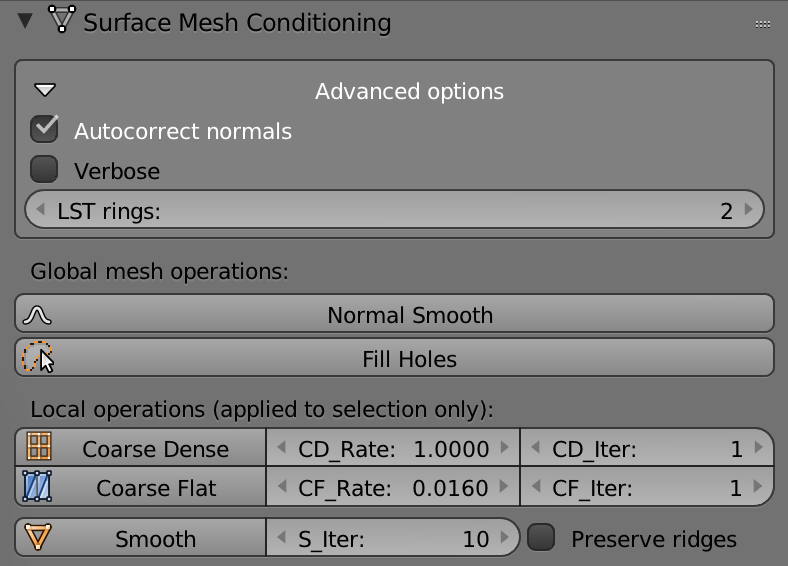
Fig. 3 Snapshot of the Surface Mesh Conditioning menu in Blender.
These operations apply to the whole mesh:
Normal Smooth: Apply Anisotropic Normal Smooth to the mesh.
Fill Holes: Triangulate holes in the mesh.
These operations are only available in Edit Mode and apply to selected vertices only:
Coarse Dense: Apply
CD_iteriterations of coarsening to dense regions of the mesh with thresholdCD_Rate(Mesh Decimation).Coarse Flat: Apply
CF_iteriterations of coarsening to flat regions of the mesh with thresholdCF_Rate(Mesh Decimation).Smooth: Apply
s_iteriterations of Weighted Vertex Smooth and Edge Flipping to smooth the mesh. - Preserve Ridges: Skip edge flips which occur along ridges of the mesh.
Advanced Options
Autocorrect normals: Check to automatically flip the orientations of mesh normals if the volume is negative.
Verbose: Whether or not operation should print to the console.
LST rings: Integer neighborhood used to compute the Local Structure Tensor (LST).
Mesh Quality Reporting Menu
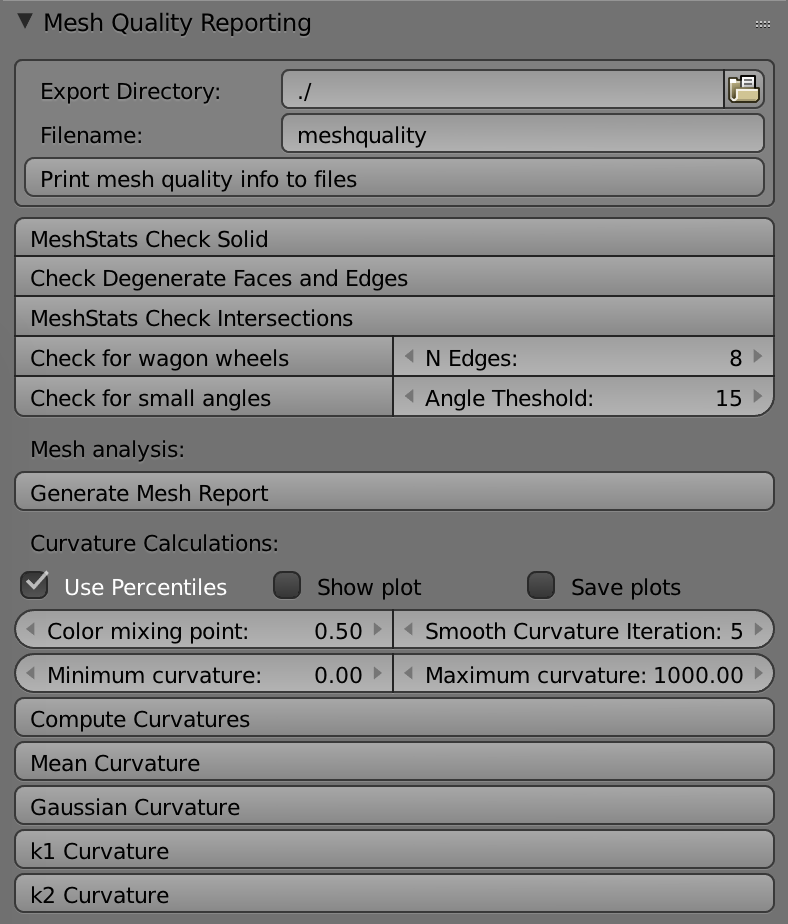
Fig. 4 Snapshot of the Mesh Quality Reporting menu in Blender.
This panel contains many convenience functions to check the quality and conditioning of the mesh.
The curvature calculations will only appear if matplotlib is detected by Blender.
Print mesh quality info to files: Dump mesh angles to flat text files.
Mesh Analysis
Check Solid: Check if the mesh contains non-manifold edges and vertices along with inconsistent normals (non-contig edges).
Check Degenerate Faces and Edges: Check for zero area/length faces/edges.
Check Intersections: Check mesh for self face intersections.
Check for wagon wheels: Check for vertices with adjacency greater than or equal to
N Edges.Check for small angles: Check for faces with angles less than or equal to
Angle Threshold.Generate Mesh Report: Runs all of the above checks with the corresponding settings.
Boundary Marking Menu
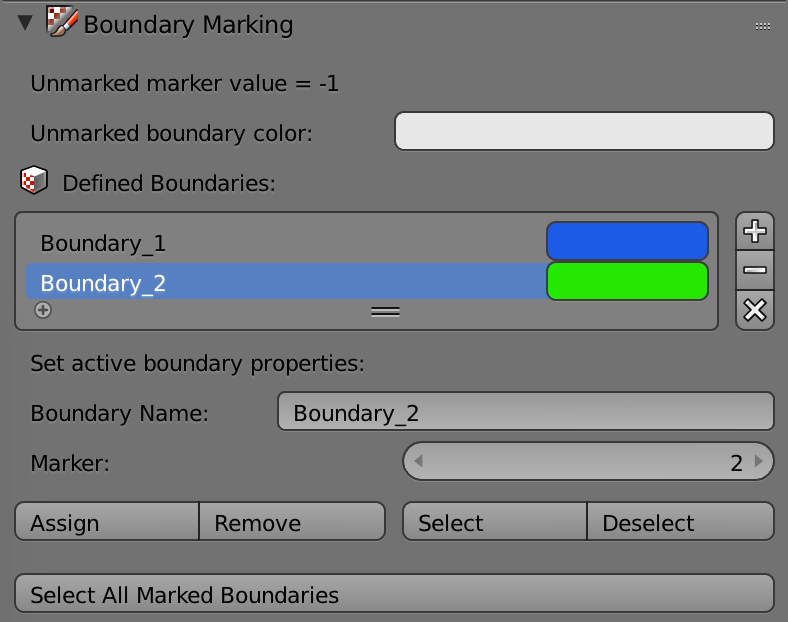
Fig. 5 Snapshot of the Boundary Marking menu in Blender.
This panel enables the easy labeling of boundary markers on a domain.
Boundaries can be added using the + button.
The selected boundary can be removed using the - button.
x removes all boundaries from a given object.
In Edit Mode selected faces can be assign-ed or remove-ed from a selected boundary.
The Select and Deselect buttons will select or deselect faces marked by a specific boundary respectively.
All marked faces can be selected using Select All Marked Boundaries.
Tetrahedralization Menu
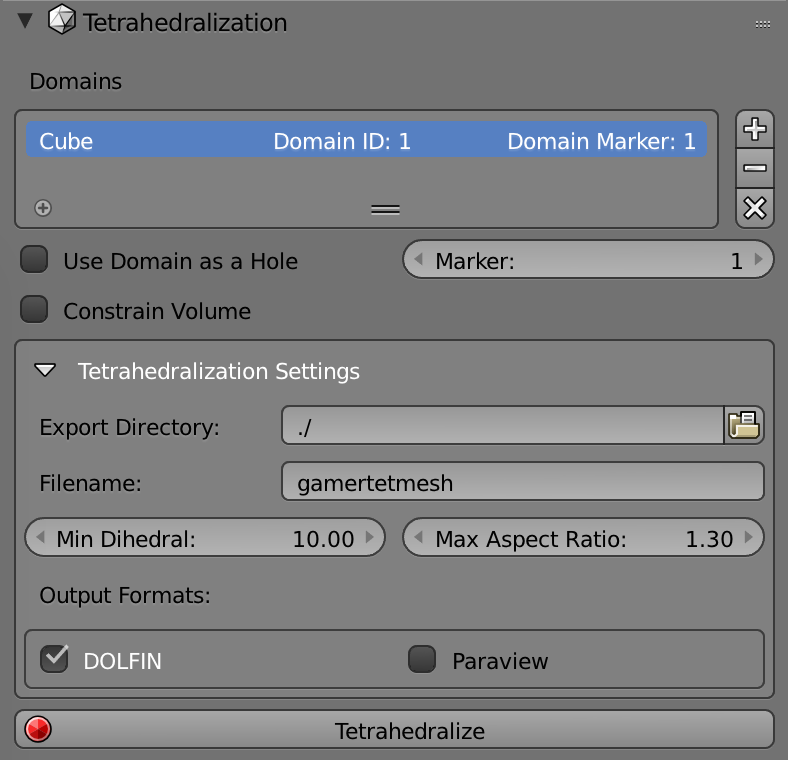
Fig. 6 Snapshot of the Tetrahedralization menu in Blender.
Individual meshes can be added as domains using the + button.
Similarly a selected domain or all domains can be removed using the - and x buttons respectively.
Domains used as a hole will not be tetrahedralized.
The marker value specified will be applied to the volume of the encapsulated domain.
The minimum dihedral angle and max aspect ratio of the resulting tetrahedra can be set as an input into TetGen.
Hitting the Tetrahedralize button will begin tetrahedralization using TetGen.